5s quảng cáo
 Mình có 1 shopee nho nhỏ bán ốp iPhone kunn.oops, mọi người ủng hộ nhé :D
Mở đầu
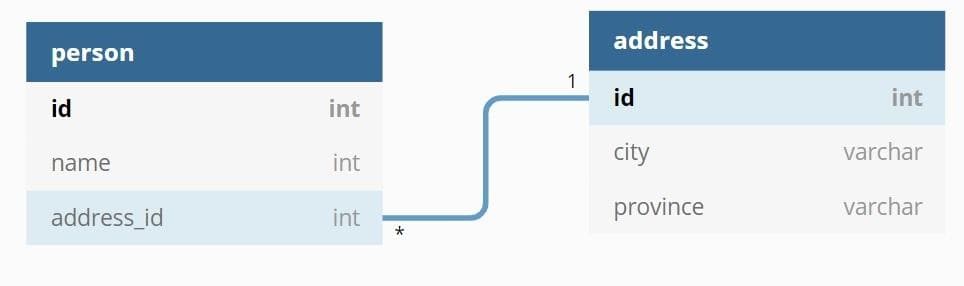
Cách biểu thị quan hệ 1-n trong cơ sở dữ liệu là rất phổ biến, ví dụ một địa chỉ có thể có nhiều người ở (gia đình).
Bình thường, khi các bạn tạo table trong csdl để biểu thị mối quan hệ này, thì bảng đại diện phía nhiều (phía n trong câu 1-n) sẽ chứa id của bảng tham chiếu (phía 1 trong câu 1-n)
Thể hiện mỗi quan hệ này một cách đầy đủ trong code bằng Hibernate thì chúng ta sẽ dùng @OneToMany và @ManyToOne.
Trong bài sử dụng các kiến thức:
Tạo project
Toàn bộ bài viết được up tại Github: github.com/loda-kun/java-all
Chúng ta sẽ sử dụng Gradle để tạo một project có khai báo Spring Boot và Jpa để hỗ trợ cho việc demo @ManyToOne.
Các bạn có thể tự tạo 1 project Spring-boot với gradle đơn giản tại: https://start.spring.io
plugins {
    id 'org.springframework.boot' version '2.1.4.RELEASE'
    id 'java'
}
apply plugin: 'io.spring.dependency-management'

group 'me.loda.java'
version '1.0-SNAPSHOT'

sourceCompatibility = 1.8

configurations {
    compileOnly {
        extendsFrom annotationProcessor
    }
}

repositories {
    mavenCentral()
}

dependencies {
    implementation 'org.springframework.boot:spring-boot-starter-data-jpa'
    implementation 'org.springframework.boot:spring-boot-starter-web'
    compileOnly 'org.projectlombok:lombok'
    runtimeOnly 'com.h2database:h2'
    annotationProcessor 'org.projectlombok:lombok'
    testImplementation 'org.springframework.boot:spring-boot-starter-test'
}
Trong ứng dụng trên bạn sẽ thấy có com.h2database:h2. Đây là một database, tuy nhiên nó chỉ tồn tại trong bộ nhớ. Tức làm mỗi khi chạy chương trình này, nó sẽ tạo database trong RAM, và tắt chương trình đi nó sẽ mất.
Chúng ta sẽ sử dụng H2 thay cho MySql để cho.. tiện!
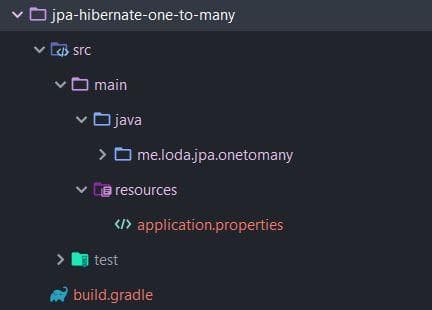
Khi tạo xong project, sẽ có thư mục như sau:
Tạo Table
Để tạo table, chúng ta tạo ra các Class tương ứng.
import java.util.Collection;

import javax.persistence.CascadeType;
import javax.persistence.Entity;
import javax.persistence.GeneratedValue;
import javax.persistence.Id;
import javax.persistence.OneToMany;

import lombok.AllArgsConstructor;
import lombok.Data;
import lombok.EqualsAndHashCode;
import lombok.NoArgsConstructor;
import lombok.ToString;

@Entity // Đánh dấu đây là table trong db
@Data // lombok giúp generate các hàm constructor, get, set v.v.
@AllArgsConstructor
@NoArgsConstructor
public class Address {

    @Id //Đánh dấu là primary key
    @GeneratedValue // Giúp tự động tăng
    private Long id;

    private String city;
    private String province;

    @OneToMany(mappedBy = "address", cascade = CascadeType.ALL) // Quan hệ 1-n với đối tượng ở dưới (Person) (1 địa điểm có nhiều người ở)
    // MapopedBy trỏ tới tên biến Address ở trong Person.
    @EqualsAndHashCode.Exclude // không sử dụng trường này trong equals và hashcode
    @ToString.Exclude // Khoonhg sử dụng trong toString()
    private Collection<Person> persons;
}
@Entity
@Data
@NoArgsConstructor
@AllArgsConstructor
public class Person {

    @Id
    @GeneratedValue
    private Long id;
    private String name;

    // Many to One Có nhiều người ở 1 địa điểm.
    @ManyToOne
    @JoinColumn(name = "address_id") // thông qua khóa ngoại address_id
    @EqualsAndHashCode.Exclude
    @ToString.Exclude
    private Address address;
}
Nếu chúng ta chưa tạo ra các table trong cơ sở dữ liệu, thì mặc định Hibernate sẽ bind dữ liệu từ class xuống và tạo table cho chúng ta.
Bạn phải tạo file config src\main\resources\application.properties như sau để kết nối tới H2 database nhé:
spring.datasource.url=jdbc:h2:mem:testdb
spring.datasource.driverClassName=org.h2.Driver
spring.datasource.username=sa
spring.datasource.password=
// Không có password, vào thẳng luôn
spring.jpa.database-platform=org.hibernate.dialect.H2Dialect
# Cho phép vào xem db thông qua web
spring.h2.console.enabled=true
Chạy thử
Bạn tạo file OneToManyExampleApplication và cấu hình Spring Boot và khởi chạy chương trình.
@SpringBootApplication
@RequiredArgsConstructor
public class OneToManyExampleApplication {
    public static void main(String[] args) {
        SpringApplication.run(OneToManyExampleApplication.class, args);
    }
}
Sau khi chạy xong, hãy truy cập vào http://localhost:8080/h2-console/ để vào xem database có gì nhé.
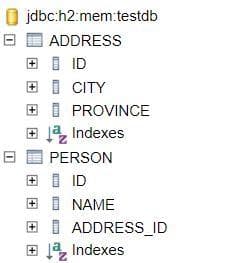
Bạn sẽ thấy nó tạo table giống với mô tả ở đầu bài. Với khóa ngoại address_id ở bảng person.
Thêm dữ liệu
Để thêm dữ liệu vào database, chúng ta sẽ dùng tới Spring JPA .
import org.springframework.data.jpa.repository.JpaRepository;

public interface AddressRepository extends JpaRepository<Address,Long> {
}
public interface PersonRepository extends JpaRepository<Person, Long> {
}
Chúng ta sẽ tạo một chương trình Spring Boot đơn giản bằng cách sử dụng CommandLineRunner để chạy code ngay khi khởi động.
import javax.transaction.Transactional;

import org.springframework.boot.CommandLineRunner;
import org.springframework.boot.SpringApplication;
import org.springframework.boot.autoconfigure.SpringBootApplication;

import com.google.common.collect.Lists;

import lombok.RequiredArgsConstructor;

@SpringBootApplication
@RequiredArgsConstructor
public class OneToManyExampleApplication implements CommandLineRunner {
    public static void main(String[] args) {
        SpringApplication.run(OneToManyExampleApplication.class, args);
    }

    // Sử dụng @RequiredArgsConstructor và final để thay cho @Autowired
    private final PersonRepository personRepository;
    private final AddressRepository addressRepository;

    @Override
    public void run(String... args) throws Exception {
        // Tạo ra đối tượng Address có tham chiếu tới person
        Address address = new Address();
        address.setCity("Hanoi");

        // Tạo ra đối tượng person
        Person person = new Person();
        person.setName("loda");
        person.setAddress(address);

        address.setPersons(Collections.singleton(person));
        // Lưu vào db
        // Chúng ta chỉ cần lưu address, vì cascade = CascadeType.ALL nên nó sẽ lưu luôn Person.
        addressRepository.saveAndFlush(address);


        // Vào: http://localhost:8080/h2-console/ để xem dữ liệu đã insert

        personRepository.findAll().forEach(p -> {
            System.out.println(p.getId());
            System.out.println(p.getName());
            System.out.println(p.getAddress());
        });

    }
}
//output:
// 2
// loda
// Address(id=1, city=Hanoi, province=null)
// Chúng ta đã có thể gọi trực tiếp address trong person sau khi query
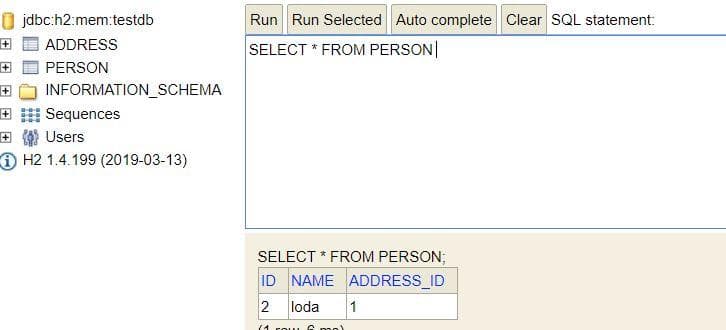
Kết quả trong database lúc này:
Bài viết của mình không còn gì để ngắn hơn được nữa :((( thật hổ thẹn, mình có up code lên đây, bạn chạy code cái là hiểu liền à:
Chúc các bạn học tập thật tốt! ahuu