5s quảng cáo
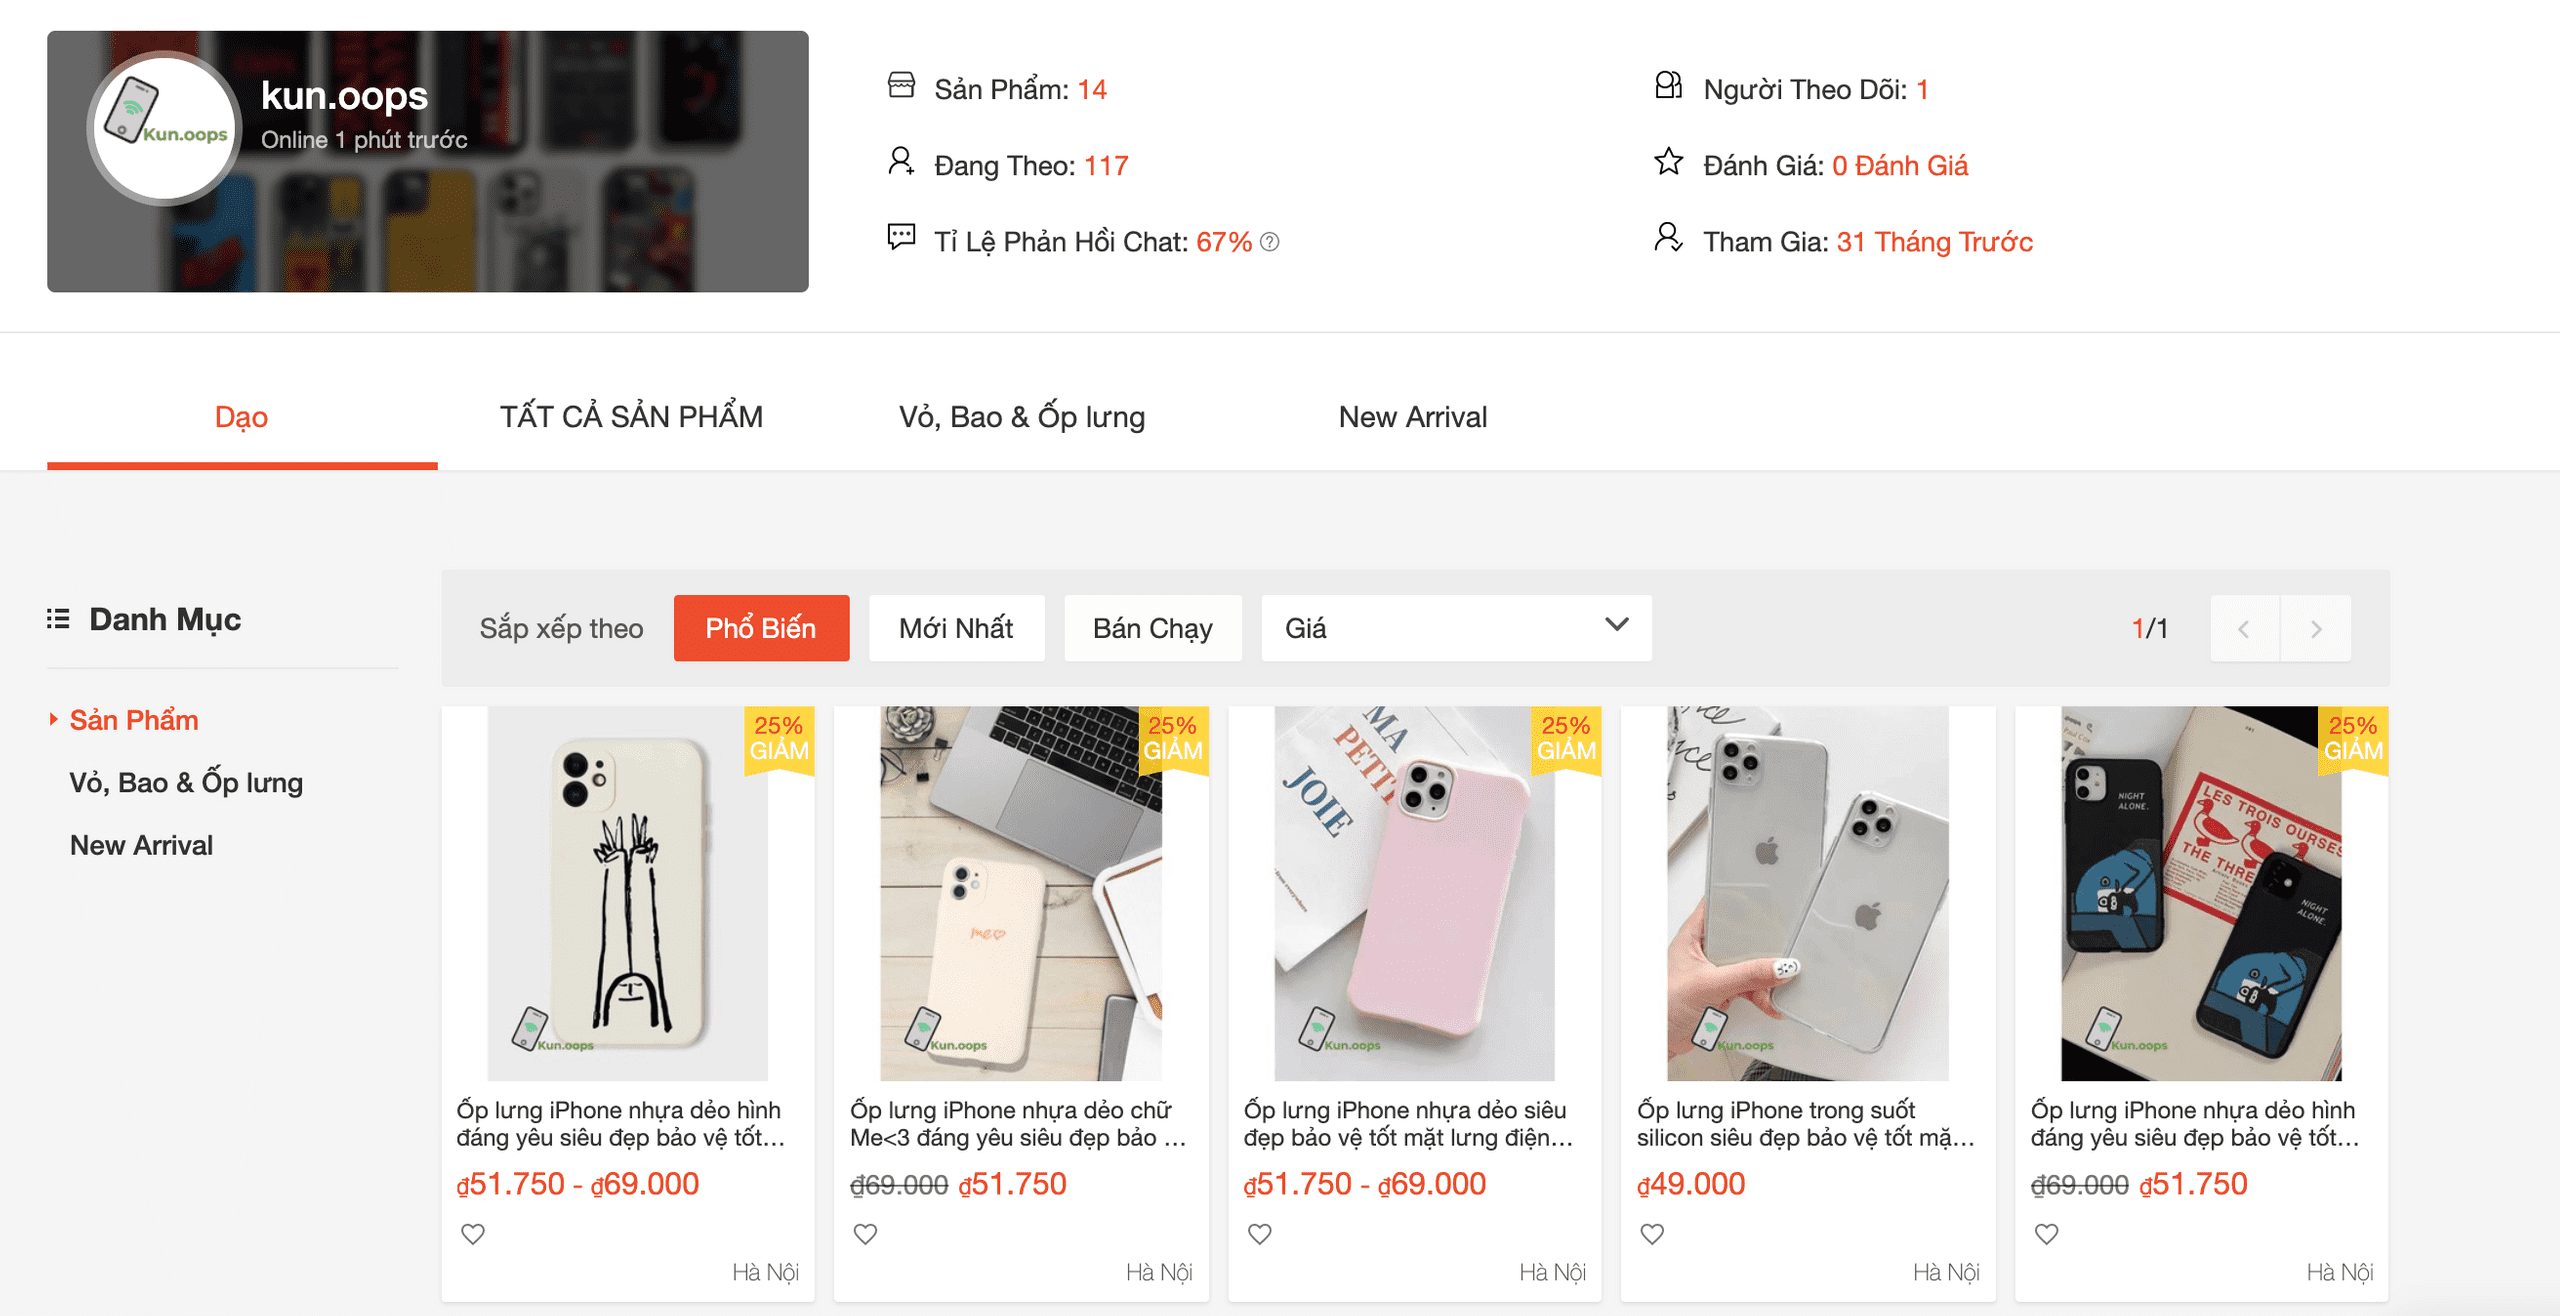 Mình có 1 shopee nho nhỏ bán ốp iPhone kunn.oops, mọi người ủng hộ nhé :D
Giới thiệu
Spring Security là một trong những core feature quan trọng của Spring Framework, nó giúp chúng ta phân quyền và xác thực người dùng trước khi cho phép họ truy cập vào các tài nguyên của chúng ta.
Trong bài hướng dẫn này, tôi sẽ hướng dẫn các bạn cách implement Spring Security một cách cơ bản nhất, đơn giản nhất, chúng ta sẽ nâng cao dần ở các bài sau.
Cài đặt
Chúng ta cài thư viện qua maven, các dependencies bao gồm:
pom.xml
<?xml version="1.0" encoding="UTF-8"?>
<project xmlns="http://maven.apache.org/POM/4.0.0" xmlns:xsi="http://www.w3.org/2001/XMLSchema-instance"
    xsi:schemaLocation="http://maven.apache.org/POM/4.0.0 http://maven.apache.org/xsd/maven-4.0.0.xsd">
    <modelVersion>4.0.0</modelVersion>

    <groupId>org.springframework</groupId>
    <artifactId>spring-security-example</artifactId>
    <version>0.1.0</version>

    <parent>
        <groupId>org.springframework.boot</groupId>
        <artifactId>spring-boot-starter-parent</artifactId>
        <version>2.0.5.RELEASE</version>
    </parent>

    <dependencies>
        <dependency>
            <groupId>org.springframework.boot</groupId>
            <artifactId>spring-boot-starter-thymeleaf</artifactId>
        </dependency>
        <dependency>
            <groupId>org.springframework.boot</groupId>
            <artifactId>spring-boot-starter-web</artifactId>
        </dependency>
        <dependency>
            <groupId>org.springframework.boot</groupId>
            <artifactId>spring-boot-starter-test</artifactId>
            <scope>test</scope>
        </dependency>
        <dependency>
            <groupId>org.springframework.security</groupId>
            <artifactId>spring-security-test</artifactId>
            <scope>test</scope>
        </dependency>
    </dependencies>

    <properties>
        <java.version>1.8</java.version>
    </properties>


    <build>
        <plugins>
            <plugin>
                <groupId>org.springframework.boot</groupId>
                <artifactId>spring-boot-maven-plugin</artifactId>
            </plugin>
        </plugins>
    </build>

</project>
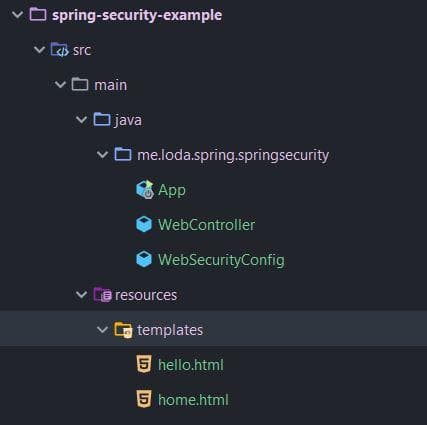
Thư mục code gồm có:
Implement
Kích hoạt tính năng WebSecurity
Trước tiên, để kích hoạt tính năng Spring Security trên ứng dụng Web của mình, các bạn cần gắn annotation @EnableWebSecurity trên một bean bất kỳ của mình.
Ở đây, tôi tạo ra một class WebSecurityConfig để là nơi tập trung các xử lý các thông tin liên quan tới security.
@EnableWebSecurity
public class WebSecurityConfig {
    // ...
}
Tạo tài khoản user
Thông thường, tài khoản user của người dùng sẽ được lưu trong csdl và mã hóa. Tuy nhiên, trong ví dụ cực kì basic này, tôi sẽ lưu một tài khoản người dùng trong chính bộ nhớ chương trình.
Cách này chỉ để demo thôi nhé, vì nó dữ liệu sẽ bị mất khi tắt ứng dụng, chúng ta sẽ tìm hiểu cách xác thực bằng csdl ở bài sau.
@EnableWebSecurity
public class WebSecurityConfig extends WebSecurityConfigurerAdapter {

    @Bean
    @Override
    public UserDetailsService userDetailsService() {
        // Tạo ra user trong bộ nhớ
        // lưu ý, chỉ sử dụng cách này để minh họa
        // Còn thực tế chúng ta sẽ kiểm tra user trong csdl
        InMemoryUserDetailsManager manager = new InMemoryUserDetailsManager();
        manager.createUser(
                User.withDefaultPasswordEncoder() // Sử dụng mã hóa password đơn giản
                    .username("loda")
                    .password("loda")
                    .roles("USER") // phân quyền là người dùng.
                    .build()
        );
        return manager;
    }
}
WebSecurityConfigurerAdapter là một interface tiện ích của Spring Security giúp chúng ta cài đặt các thông tin dễ dàng hơn.
Method userDetailsService() có tác dụng cung cấp thông tin user cho Spring Security, chúng ta Override lại method này và cung cấp cho nó một User là loda.
Phân quyền truy cập
Khi đã có User, chúng ta sẽ cần phân quyền xem một User sẽ được phép truy cập vào những tài nguyên nào.
Lúc này, vẫn ở trong WebSecurityConfigurerAdapter, chúng ta override lại method protected void configure(HttpSecurity http) để thực hiện việc phân quyền.
import org.springframework.context.annotation.Bean;
import org.springframework.security.config.annotation.web.builders.HttpSecurity;
import org.springframework.security.config.annotation.web.configuration.EnableWebSecurity;
import org.springframework.security.config.annotation.web.configuration.WebSecurityConfigurerAdapter;
import org.springframework.security.core.userdetails.User;
import org.springframework.security.core.userdetails.UserDetailsService;
import org.springframework.security.provisioning.InMemoryUserDetailsManager;

@EnableWebSecurity
public class WebSecurityConfig extends WebSecurityConfigurerAdapter {

    @Bean
    @Override
    public UserDetailsService userDetailsService() {
        // Tạo ra user trong bộ nhớ
        // lưu ý, chỉ sử dụng cách này để minh họa
        // Còn thực tế chúng ta sẽ kiểm tra user trong csdl
        InMemoryUserDetailsManager manager = new InMemoryUserDetailsManager();
        manager.createUser(
                User.withDefaultPasswordEncoder() // Sử dụng mã hóa password đơn giản
                    .username("loda")
                    .password("loda")
                    .roles("USER") // phân quyền là người dùng.
                    .build()
        );
        return manager;
    }

    @Override
    protected void configure(HttpSecurity http) throws Exception {
        http
                .authorizeRequests()
                    .antMatchers("/", "/home").permitAll() // Cho phép tất cả mọi người truy cập vào 2 địa chỉ này
                    .anyRequest().authenticated() // Tất cả các request khác đều cần phải xác thực mới được truy cập
                    .and()
                .formLogin() // Cho phép người dùng xác thực bằng form login
                    .defaultSuccessUrl("/hello")
                    .permitAll() // Tất cả đều được truy cập vào địa chỉ này
                    .and()
                .logout() // Cho phép logout
                    .permitAll();
    }
}
HttpSecurity là đối tượng chính của Spring Security, cho phép chúng ta cấu hình mọi thứ cần bảo mật, và nó được xây dựng dưới design pattern giống với Builder Pattern, nên mọi cài đặt có thể viết liên tục thông qua toán tử .
Ở ví dụ trên, những gì chúng ta muốn cho phép, chúng ta sẽ xài method .permit(), còn những gì cấm hoặc yêu cầu xác thực sẽ dùng .authenticated()
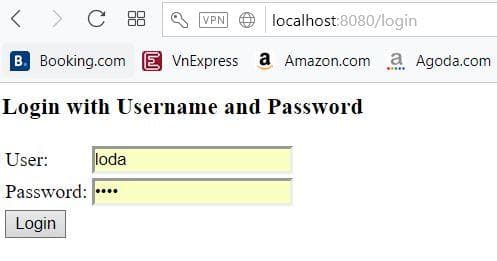
Khi gọi .formLogin() thì chúng ta cấu hình cho phép người dùng đăng nhập, thông qua địa chỉ mặc định /login do Spring Security tự tạo ra (Cái này có thể custom theo ý mình được, nhưng chúng ta sẽ tiếp cận ở bài sau).
Tương tự .logout() cho phép người dùng logout, Nếu không nói gì thêm, Spring Security sẽ mặc định tự tạo ra một trang logout với địa chỉ /logout.
Thêm controller.
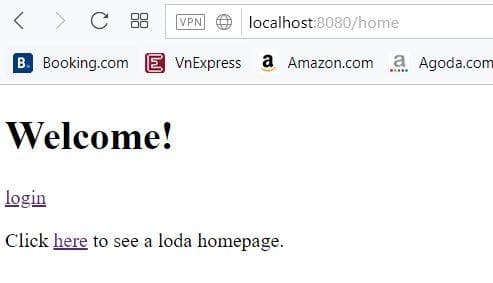
Chúng ta tạo ra trang web của mình gồm có trang homepage và trang hello.
- Trang
homepagethì ai cũng truy cập được. - Trang
hellothì phải xác thực mới được truy cập.
Các địa chỉ /login và /logout thì không cần tạo, Spring Security đã tạo sẵn rồi, chúng ta dùng lại luôn.
import org.springframework.stereotype.Controller;
import org.springframework.web.bind.annotation.GetMapping;

@Controller
public class WebController {

    @GetMapping(value = {"/", "/home"})
    public String homepage() {
        return "home"; // Trả về home.html
    }

    @GetMapping("/hello")
    public String hello() {
        return "hello"; // Trả về hello.html
    }

}
Ukie, đơn giản vậy thôi, bây giờ cần tạo ra các trang home.html và hello.html.
Vì ở trong file pom.xml chúng ta đã cài thư viện thymeleaf. Nên nó sẽ tự động mapping tên tương ứng trong Controller trả về với các file ở bên trong thư mục resources/templates/
<dependency>
    <groupId>org.springframework.boot</groupId>
    <artifactId>spring-boot-starter-thymeleaf</artifactId>
</dependency>
hello.html
<!DOCTYPE html>
<html lang="en" xmlns:th="http://www.thymeleaf.org">
<head>
  <title>Hello</title>
</head>
<body>
<h1>Chỉ những ai đăng nhập mới truy cập được trang này!</h1>

<form th:action="@{/logout}" method="post">
  <input type="submit" value="Sign Out"/>
</form>

</body>
</html>
Cú pháp th:action="@{/logout}" là của thymeleaf, có tác dụng request tới địa chỉ /logout
home.html
<!DOCTYPE html>
<html lang="en" xmlns:th="http://www.thymeleaf.org">
<head>
  <title>Spring Security Example</title>
</head>
<body>
<h1>Welcome!</h1>

<p><a href="/login">login</a></p>
<p>Click <a href="https://daothaison.me">here</a> to see a loda homepage.</p>

</body>
</html>
Chạy thử
Chạy ứng dụng bằng cách implement @SpringBootApplication
import org.springframework.boot.SpringApplication;
import org.springframework.boot.autoconfigure.SpringBootApplication;

@SpringBootApplication
public class App {
    public static void main(String[] args) {
        SpringApplication.run(App.class, args);
    }
}
Khi chạy xong, truy cập vào đường dẫn http://localhost:8080/home để vào trang chủ.
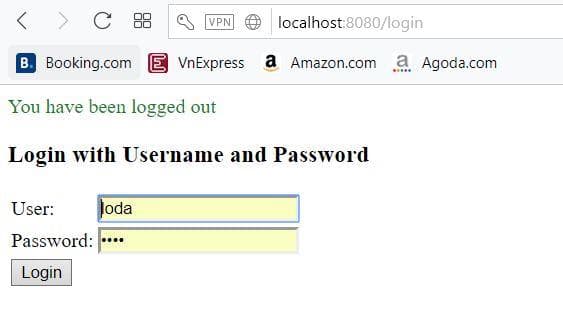
Khi chưa đăng nhập, chúng ta truy cập vào đường dẫn /hello. Thì nó sẽ tự redirect sang trang /login.
Khi đã đăng nhập thành công, chúng ta sẽ có thể vào trang /hello như bình thường.
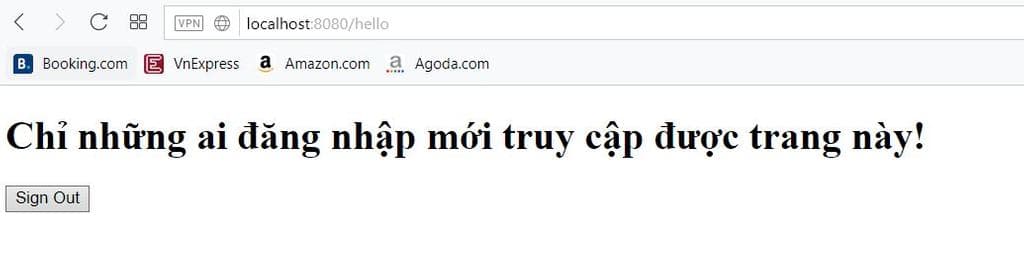
Khi click vào Sign Out thì sẽ đăng xuất.
Kết
Trong bài này, tôi đã giới thiệu với các bạn về Spring Security đồng thời giới thiệu các khái niệm cơ bản về User và phân quyền. Ở các bài nâng cao sau, tôi sẽ giới thiệu thêm với các bạn về cách xác thực người dùng trong csdl và xác thực bằng OAuth 2.0
Như mọi khi, code bài viết được up tại Github
Bài viết liên quan: